WordPress Training Guide
This guide will cover the essentials of using WordPress and the unique custom features we’ve built for you. If you have questions, please reach out to us!
Table of Contents
Training Video
WordPress Basics
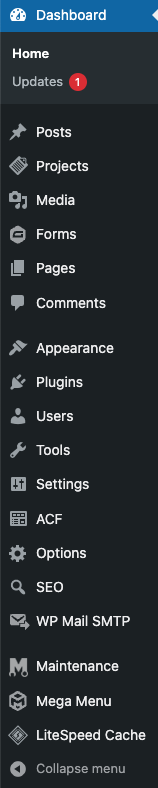
The WordPress Dashboard & Left Hand Menu
Toggling Between the Frontend & Backend of the Website
Media
Content
Plugins
Custom Blocks
Posts and Custom Post Types
View the Full Training Video
Site Access
In the future you may need to grant permissions to others or adjust who can access different parts of your site. Here’s how you can manage user accounts and control site access:
Adding a New User
- Go to “Users” > “Add New.”
- Fill in the user information, including username, email, first name, last name, and password.
- Choose the appropriate role for the user (e.g., Administrator, Editor, Author, Contributor, Subscriber).
- Click “Add New User.”
Editing an Existing User
- Go to “Users” > “All Users.”
- Click on the username of the user you want to edit.
- Make the necessary changes, such as updating the email, changing the role, or resetting the password.
- Click “Update User.”
Deleting a User
- Go to “Users” > “All Users.”
- Hover over the username of the user you want to delete and click “Delete.”
- You will be prompted to reassign or delete the content created by this user. Choose the appropriate option and confirm the deletion.
User Roles and Permissions
Understanding user roles is crucial for managing site access effectively. Here are the default WordPress user roles and their capabilities:
Subscriber: Can manage their own profile and view content. Suitable for membership or subscription-based sites.
Administrator: Full access to all site features, including theme and plugin management, user management, and content creation/editing.
Editor: Can publish and manage posts, pages, and other content types created by any user.
Author: Can publish and manage their own posts.
Contributor: Can write and manage their own posts but cannot publish them. Posts must be approved by an Editor or Administrator.
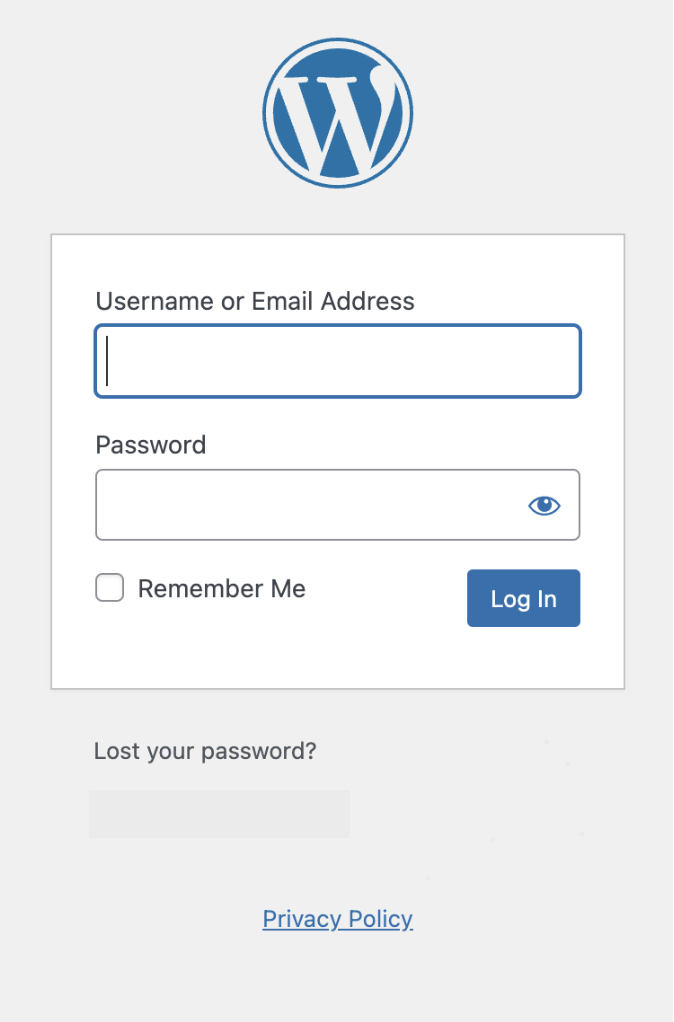
Logging into WordPress
Go to https://sikpics.ca/login
Enter your login credentials provided by the administrator.
Once logged in, you’ll be directed to the WordPress dashboard.
If you forget your password in the future, you can use the “Lost your password?” functionality below the login.
The WordPress Dashboard & Left Hand Menu
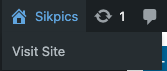
Toggling between the Frontend & Backend of the Website
When you are in the backend, click on the house icon on the top left of your screen to toggle between the backend and frontend.
This helps in quickly locating and editing specific pages.
Media Overview
The Media Library contains all of the images, videos, logos and PDFs that are on your site. As there is quite a lot of media on your site, it has been divided into categories to make them more accessible.

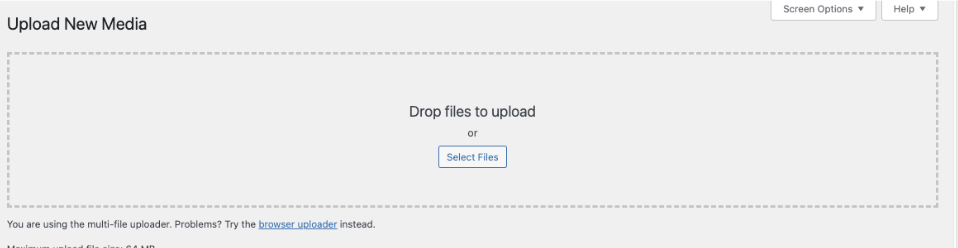
Adding New Images & Videos
On the top of the Media Library, click on Add New. Then select the image or video that you want to upload.

The Upload option will open up and you can select or drag and drop images from your computer here.
Replacing Existing Images
Hovering over the image will show the formatting options.
Clicking on the “x” will remove the image. The “Pencil” helps you to edit the existing image.
After removing the image, you can add a new one by clicking on “Add Image”
Add Image: Clicking here opens up the The Media Library.
The Media Library tab shows the images that are already on the website.
To add a new image you would click on the “Upload Files”
You can drag and drop or select files from your computer to upload.

Add Image: Clicking here opens up the The Media Library.
The Media Library tab shows the images that are already on the website.
To add a new image you would click on the “Upload Files”
You can drag and drop or select files from your computer to upload.
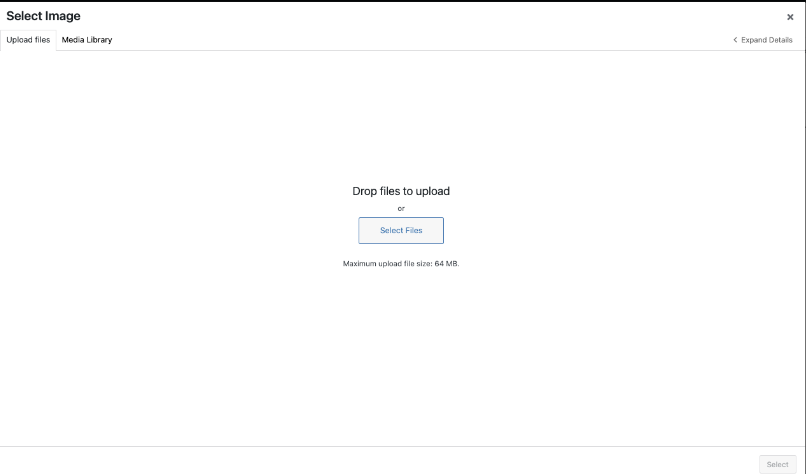
Image Sizes (General)
Recommended Pixel Sizes
Feature image sizes (landscape 1200 x 900 pixels)
Feature image sizes (portrait 900 x 1200 pixels)
Background image size (1920 x 1080 pixels)
Logo image size (200 x 100 pixels)
Thumbnail image size (150 x 150 pixels)
Image Formats
JPEG or PNG
Image File Size
Optimize every JPEG and PNG before uploading to improve website performance. Compressing images enhances speed without sacrificing quality. Use squoosh.app for effective compression without resizing images.
Image Sizes (Styles Panel)
Image Sizes:
When inserting an image, you can choose:
- Thumbnail / Medium / Large – Pre-set sizes
- Full Size – Original resolution (best for full-width layouts)
Tip: Use Full Size if you want the image to stretch across the container and stay sharp.
Layout Tips:
- Place images inside groups or columns for better control.
- A good structure: Group → Full-width column → Image.
Images outside of groups can shrink other elements (like videos) dependant on the size selected.
Styling Tips:
In the right-hand panel:
- Change image size
- Adjust alignment (center, full-width, etc.)
Best Practices:
- Use Full Size for sharper, full-width images
- Wrap single images in Groups or Columns

Editing Content
Most of the content on this site is in the form of headings and paragraphs. In some cases, certain words have web links added to them. These links can take you to pages within the site or an external site.
Saving all edits:
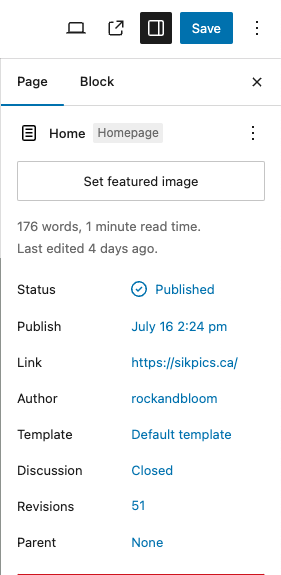
All page edits must be saved by clicking on the “Save” Button on the top right of the screen
Formatting Text
To make your content more engaging and easier to read, you can format your text in various ways:
- Bold: Highlight text and click the “B” button.
- Italic: Highlight text and click the “I” button.
- Headings: Use headings to organize content. Select the text and choose the appropriate heading level from the drop-down menu in the editor.
- Lists: Create bullet points or numbered lists by clicking the respective buttons.
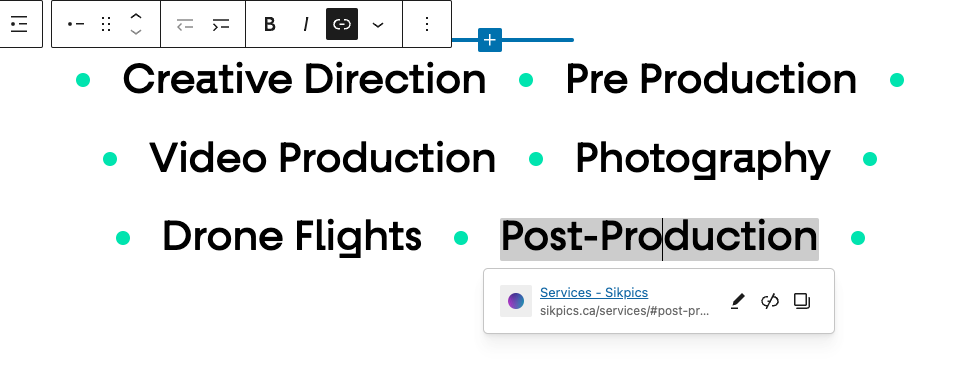
You can also add links to your content that would link to another page on your site (and internal link) or link to a different website (an “external link”)
To add a link to a certain word or phrase:
- highlight the word or phrase you would like to add a link to.
- Click on the “chain link” icon.
- Paste in or search for the link that you would like to add.
- Click on the link and press Enter.
- To add an external link, follow the same steps as above, except after adding the link, make sure the “Open in new tab” option is selected.


Schedule Post
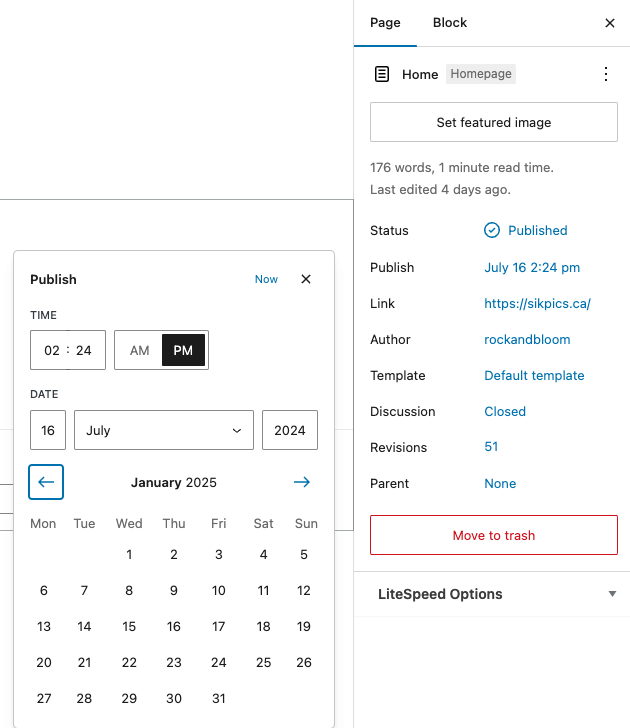
To schedule a post:
- Go to the Publish section on the right sidebar.
- Click the current publish value. The image, the value is Immediately.
- Set the date and time the post should be published on.
- Select the Schedule button that appeared on the top bar.
Redirects
To add a redirect to a page (which is often used for social media purposes) go the Tools > Redirection:
- Add the Source URL
- The new url (URL you wish to redirect from)
- Do NOT include https://sikpics.ca/, you only need / in front of the new url
- Ignore Query Parameters
- Stay as default “Exact match in any order”
- Add the Target URL
- The old URL (URL you wish to redirect to)
- Do NOT include https://sikpics.ca/, you only need / in front of the old url
- Ignore Group
- Stay as default “Redirections”
- Click Save
Redirects already created can be edited or deleted by hover over the redirect name and selecting the required action.


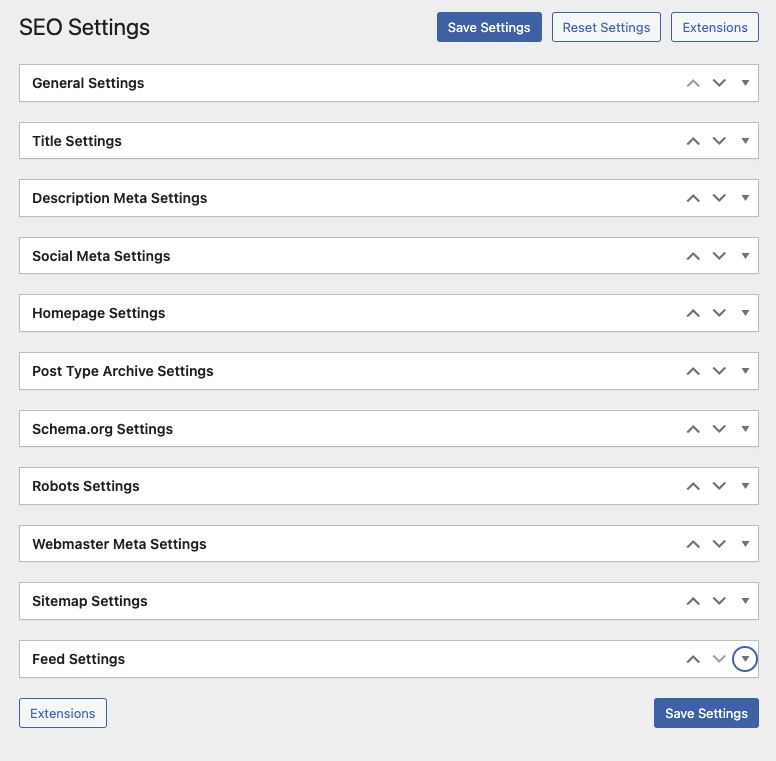
SEO Plugin
The SEO Framework plugin helps optimize your WordPress site for search engines. It automatically generates meta titles, descriptions, and structured data while providing a simple interface to customize your SEO settings for each page or post.
- Access the SEO Settings:
- Go to the WordPress dashboard and click on the page or post you want to optimize.
- Edit Meta Information:
- Scroll down to the SEO Framework meta box.
- Review the Title and Description fields. These are pre-filled but can be customized for better SEO.
- Check SEO Status:
- Use the colored SEO bars to review your optimization status. Green indicates good SEO.
- Customize Schema Settings (Optional):
- Adjust schema (structured data) options for better search engine visibility.
- Save Your Changes:
- Click Update or Publish to apply your SEO settings.
- Review Global Settings (Optional):
- Navigate to SEO > Settings in the dashboard to configure site-wide SEO preferences, including homepage, archives, and social media integration.
This process ensures each page is optimized while leveraging the plugin’s automation for consistent results.


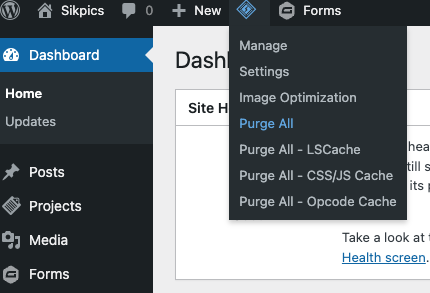
LiteSpeed Cache Plugin
The LiteSpeed Cache plugin is a powerful tool to optimize your website’s performance by caching pages, images, and other content. It helps speed up page load times by storing a temporary version of your site for visitors to access quickly.
When to Use the Quick Purge Option
Sometimes, after making updates to the website, changes might not display immediately due to caching. In such cases, you can use the “Quick Purge” option to clear the cache and ensure your edits appear on the live site.
How to Perform a Quick Purge
- Access the WordPress Dashboard: Log in to your website’s WordPress admin area.
- Locate the LiteSpeed Cache Menu: On the left-hand menu, click LiteSpeed Cache or hover over it.
- Quick Purge Options:
- Hover over the LiteSpeed Cache logo at the top admin bar.
- Click Purge All to clear all cached content across the site.
- Check Your Changes: Refresh the page to confirm your edits are now visible.
Important Notes
- Use the “Purge All” option sparingly, as it clears the cache for the entire site, which may briefly impact performance.
For more detailed control, consult the LiteSpeed Cache settings, but the quick purge options should resolve most issues related to cached edits.
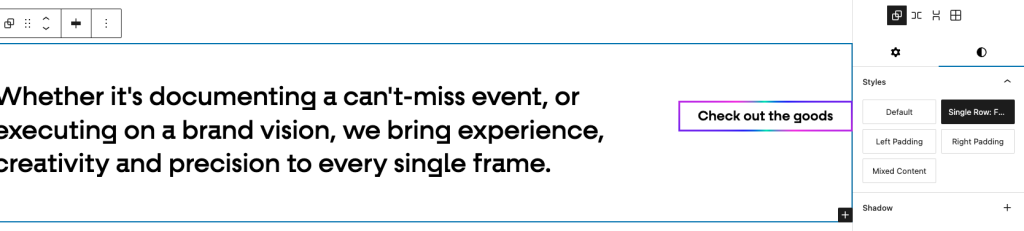
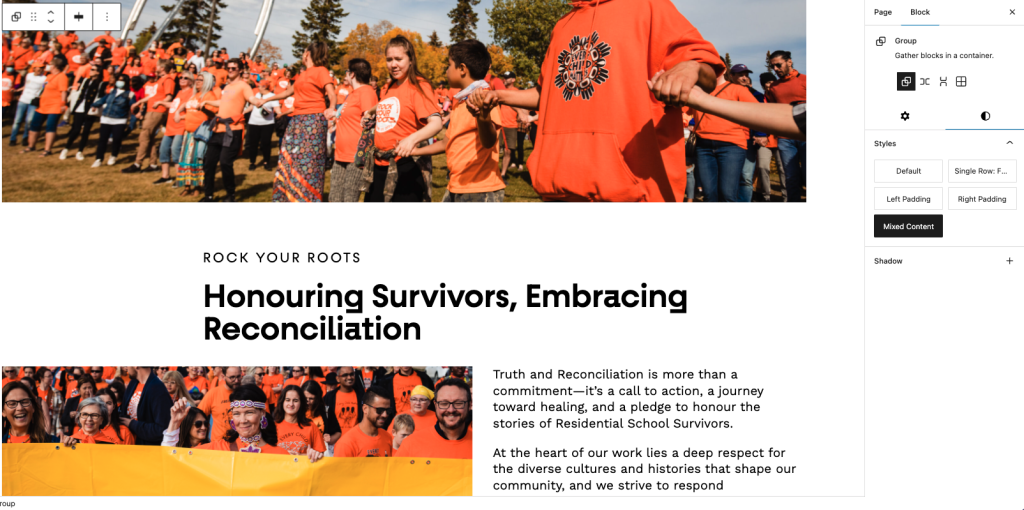
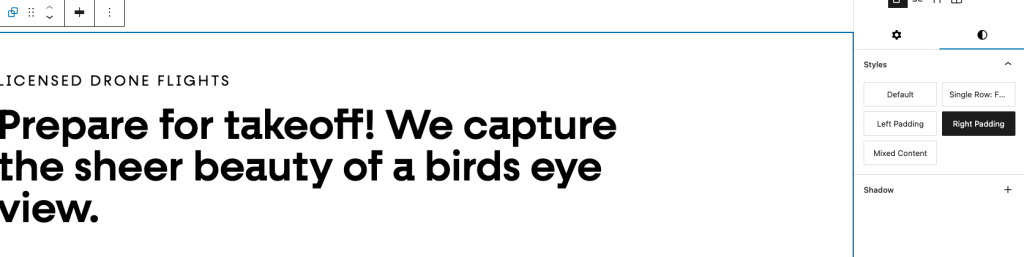
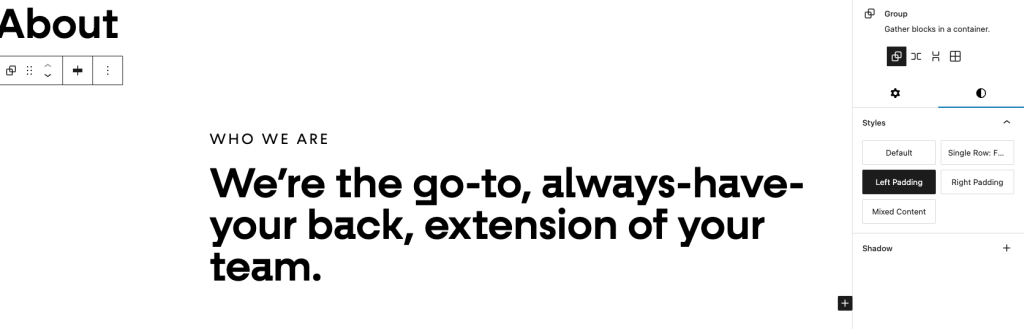
Group
Group sections together with the group block. It adds padding to the top and bottom of the section and centres the content on the page.
There are 5 style options:
- Default: White background, no extra padding or margins around content
- Single Row: Full Width: Provides a single row layout that spans the width of the parent container. Use for headings with buttons.
- Left Padding: Adds padding to the left side of the group. Use for headings and content. Can be used within Mixed Content groups.
- Right Padding: Adds padding to the right side of the group. Use for headings and content. Can be used within Mixed Content groups.
- Mixed Content: Adds consistent spacing between larger groups of various content. Used for entire Case Study pages, Studio page and Rock Your Roots feature.
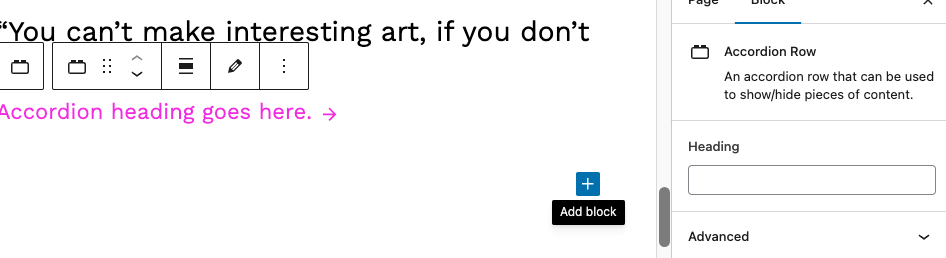
Accordion Row
This block requires:
- Heading
- Content:
- Edit in Preview Mode
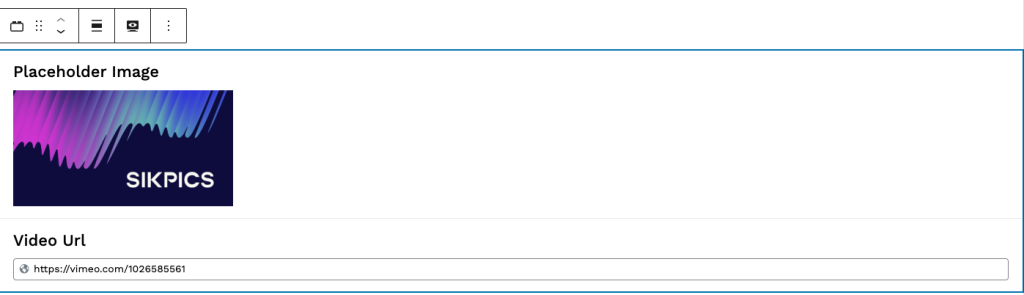
Homepage Video Banner
A full width video (or image) banner for the homepage.
This block requires:
- Placeholder Image: Displays while video loads in OR if no video link is provided.
- Video URL: Vimeo video link in proper format. E.g. https://vimeo.com/1234567890
Do NOT include inside Group.
Subpage Banner
Group block to briefly introduce the page using group styles and headings.
This block requires:
- Group block: Either Left or Right Padding
- Headings:
- Main Heading: Use an H1
- Subheading (optional): Use an H5
Keep this short and tagline-esque.
Scrolling Logos
Block with logos that scroll infinitely.
This block includes 2 rows and requires:
- Row 1 and Row 2:
- Add with “Add to gallery” button
- Remove by hovering over image and selecting “x”
- Minimum 4 logos in each gallery
- Heading (optional):
- Add with “+” button inside block
- Edit by clicking heading text


Project Feature
This block requires:
- Project:
- Select project to be featured using the dropdown.
- Video URL (optional):
- Vimeo video url in proper format
- If NO url is provided the project’s featured image will display.
- Heading:
- Add with “+” button inside block
- Edit by clicking heading text
- Keep this short and tagline-esque.
Do NOT include inside Group.
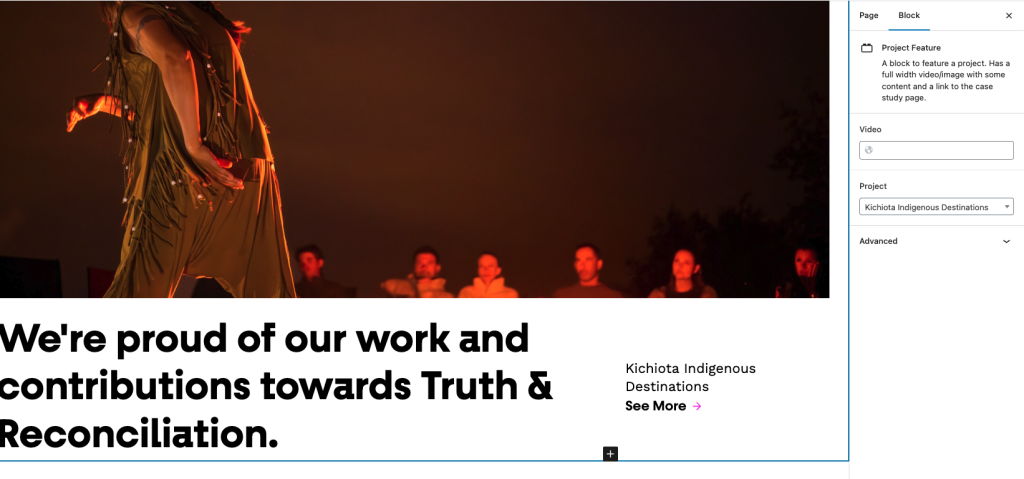
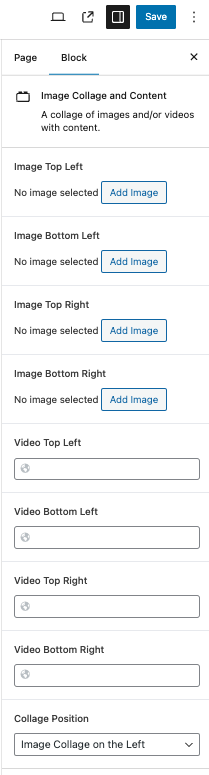
Image Collage & Content
This block requires:
- Images:
- Add with “Add Image” button
- Remove by hovering over image and selecting “x”
- Requires either 4 images OR 4 video urls
- Collage Position:
- Use the dropdown to choose layout
- Heading:
- Add with “+” button inside block
- Edit by clicking heading text
- Keep this short and tagline-esque.
- Optional Content:
- List
- Button
- Paragraph
- Add with “+” button inside block
Do NOT include inside Group.

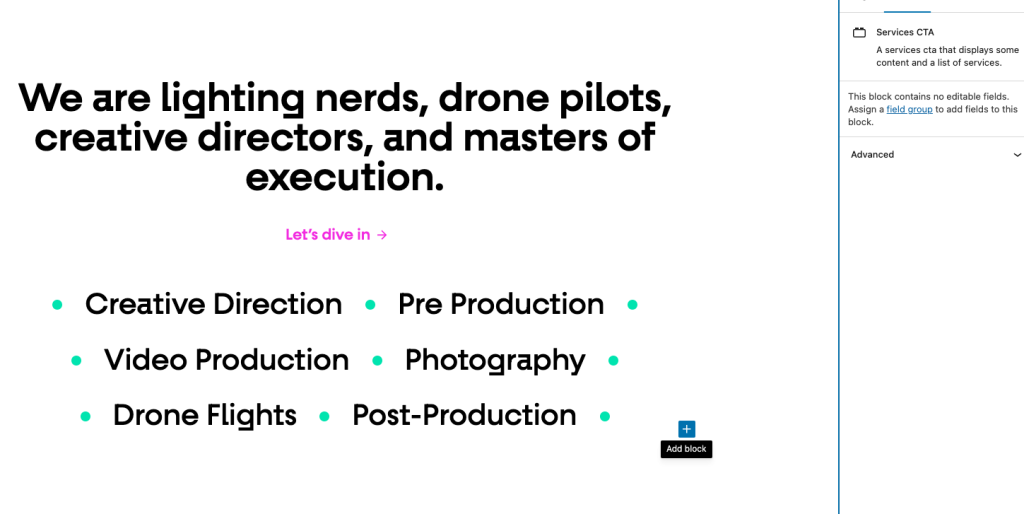
Services CTA
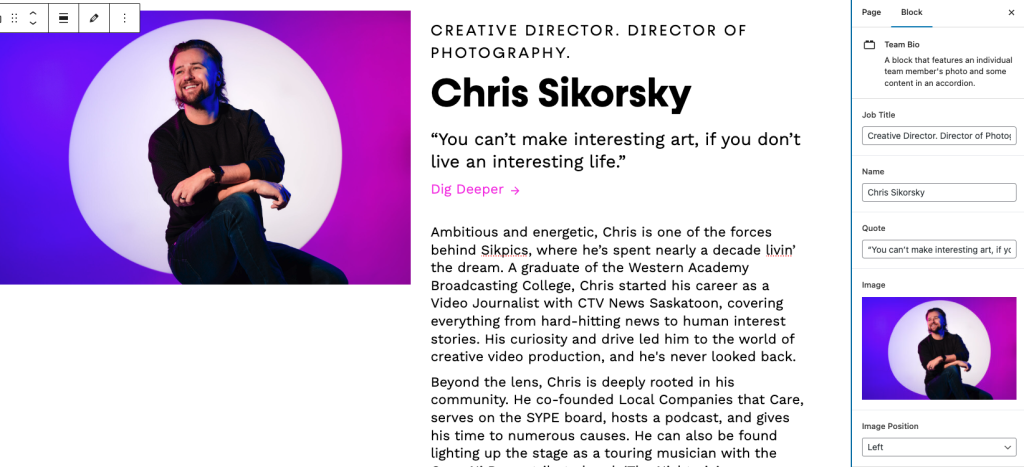
Team Bio
This block requires:
- Image
- Image Position: Right or Left
- Job Title
- Name
- Quote
- Accordion Row:
- Heading
- Content
Do NOT include inside Group.
Stacked Image & Content
Used on the Voice Talent & Recording page!
This block requires:
- Image
- Accordion Row:
- Heading
- Content: Edit in Preview Mode
Do NOT include inside Group.
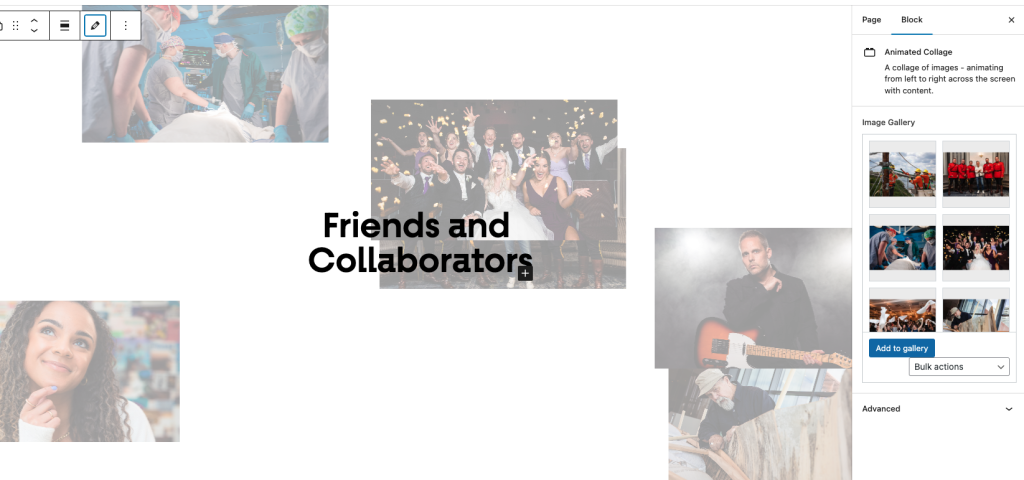
Animated Collage
This block requires:
- Images:
- Add with “Add to gallery” button
- Remove by hovering over image and selecting “x”
- Requires 8 images
- Content: Edit in Preview Mode
Do NOT include inside Group.
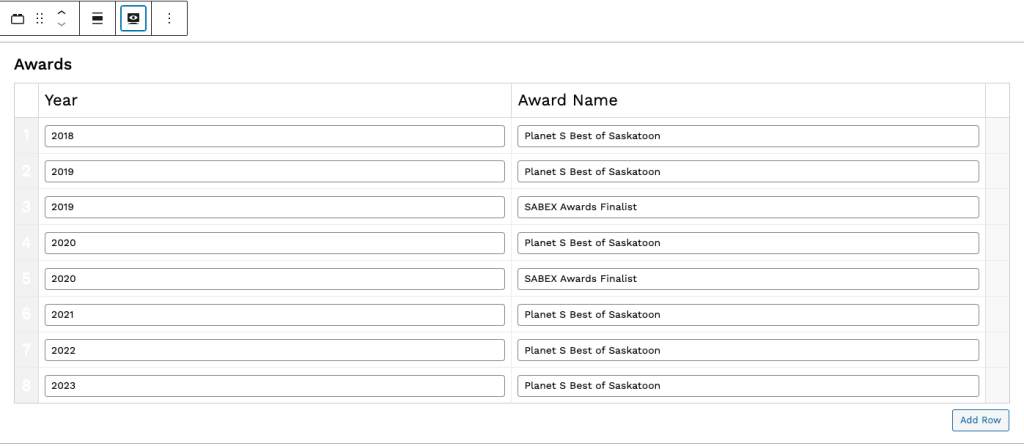
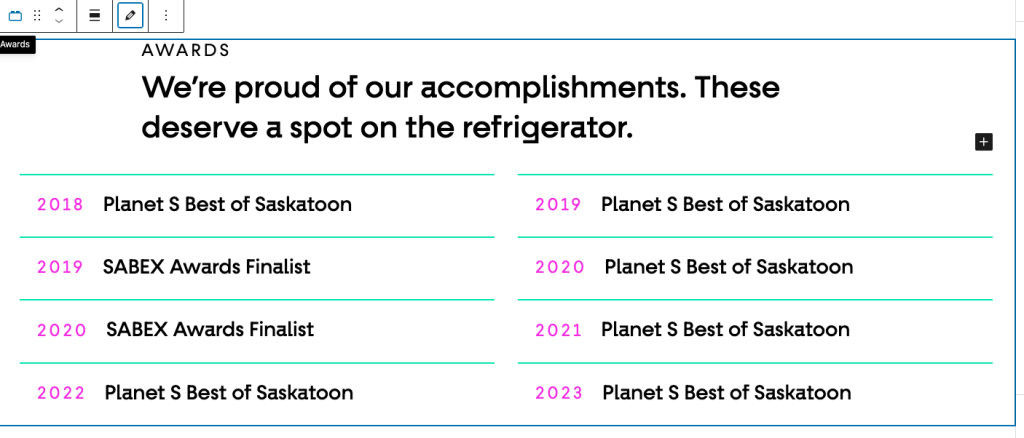
Awards
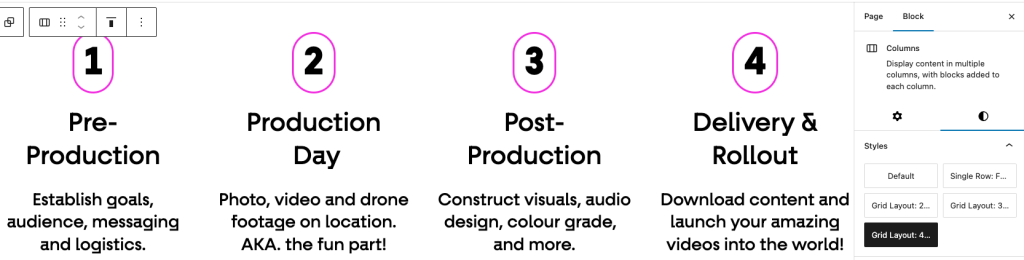
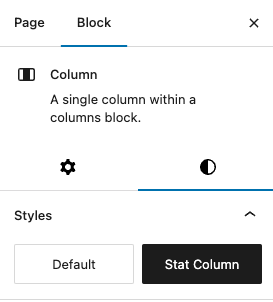
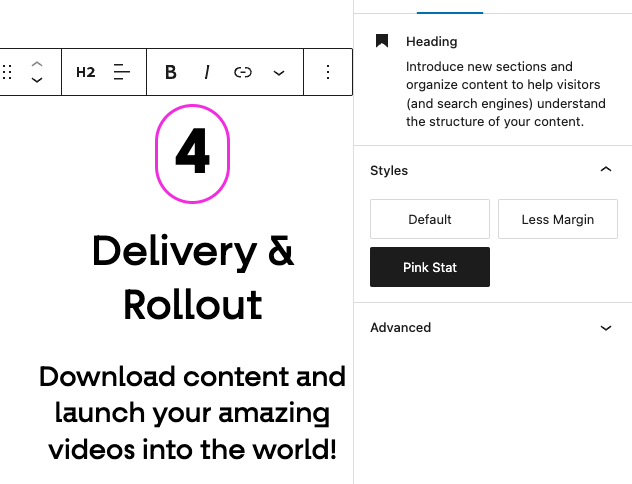
Stat Columns
Add a default group to the page.
Add a columns block inside of the group with 2, 3, or 4 columns and select matching columns style.
Each column within the columns block needs to Stat Column style applied.
- Columns Styles:
- Grid Layout: 2up
- Grid Layout: 3up
- Grid Layout: 4up
- Column Style: Stat Column
- Content: Edit in Preview Mode
- Heading: Needs Pink Stat style applied
Include inside Group and columns.
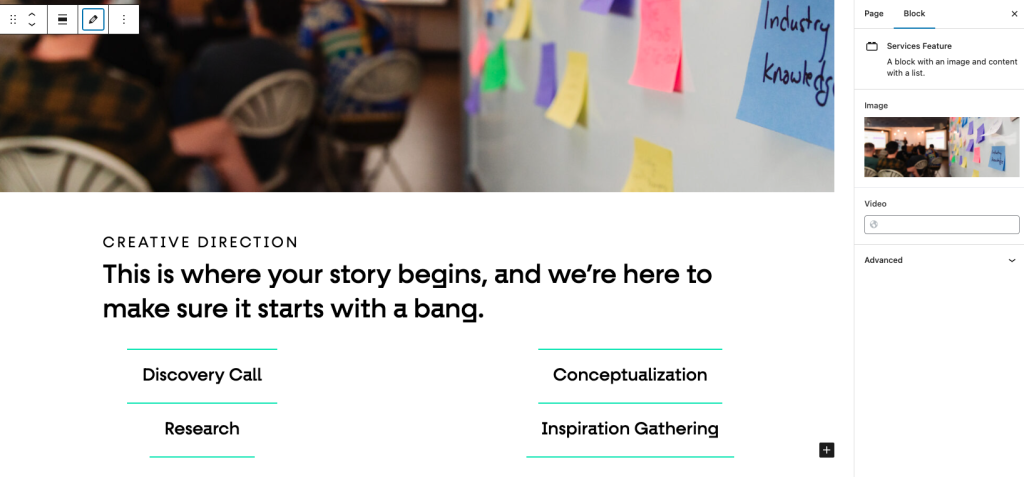
Services Feature
This block requires:
- Image
- Content: Edit in Preview Mode
- List:
- Click into the end of the last list item, hit “Enter” and start typing the new list item
Do NOT include inside Group.
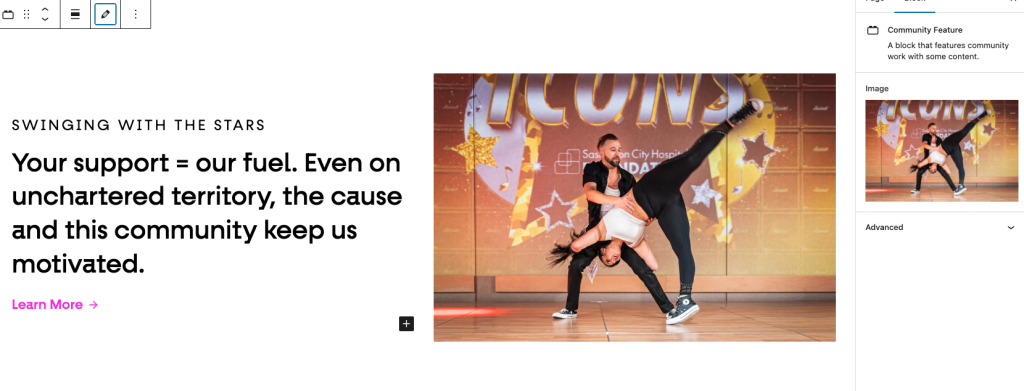
50/50 Image & Content (Community Feature)

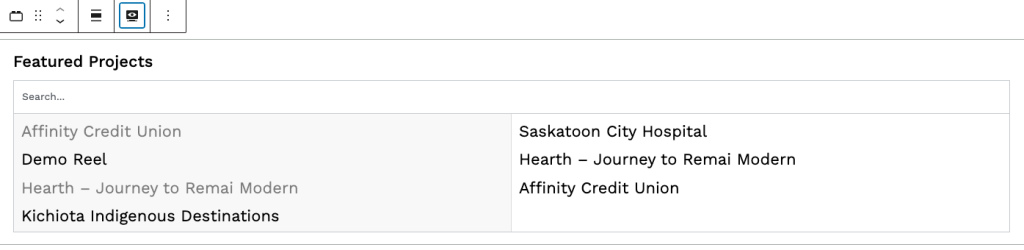
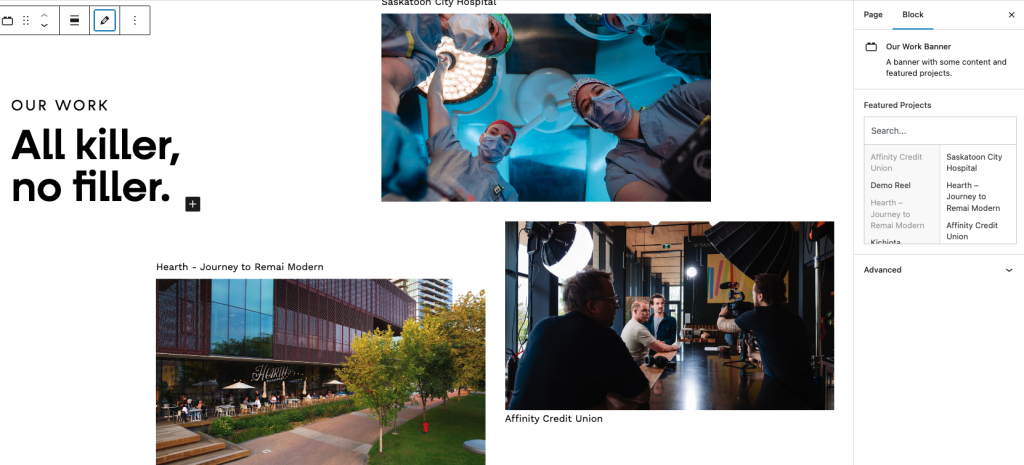
Our Work Banner
Select projects to display as featured projects. The project needs to be added to Project to be available in this block.
- Can search from projects by name in the search bar
- Add project by selecting title on the left
- Remove featured project by hovering over the title selected on the right and clicking “-“
- Reorder the featured projects with drag and drop on the right
This block requires:
- 3 Projects
- Content: Edit in Preview Mode
Do NOT include inside Group.
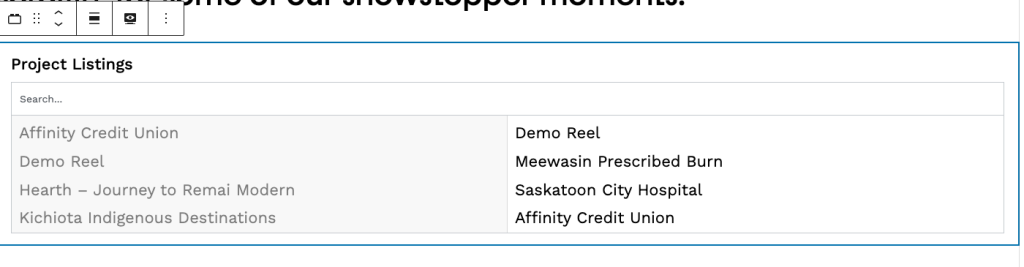
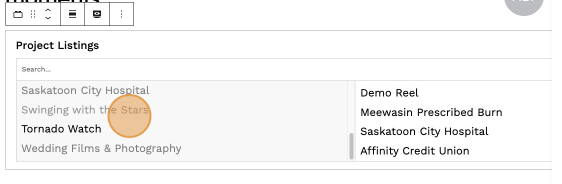
Project Listings
Select projects to display on the Our Work page. The project needs to be added to Projects and published to be available in this block.
- Can search from projects by name in the search bar
- Add project by selecting title in the left column. If it is grey that means it is already added to the right column and visible. Any Project titles in black on the left column are NOT yet added and can be clicked or dragged to the right column to be added to the Our Work page.
- Remove project by hovering over the title selected on the right and clicking “-“
- Reorder the projects with drag and drop on the right. The order they are shown on the right side is how they will be ordered on the Our Work page.
This block requires:
- Projects
Do NOT include inside Group.
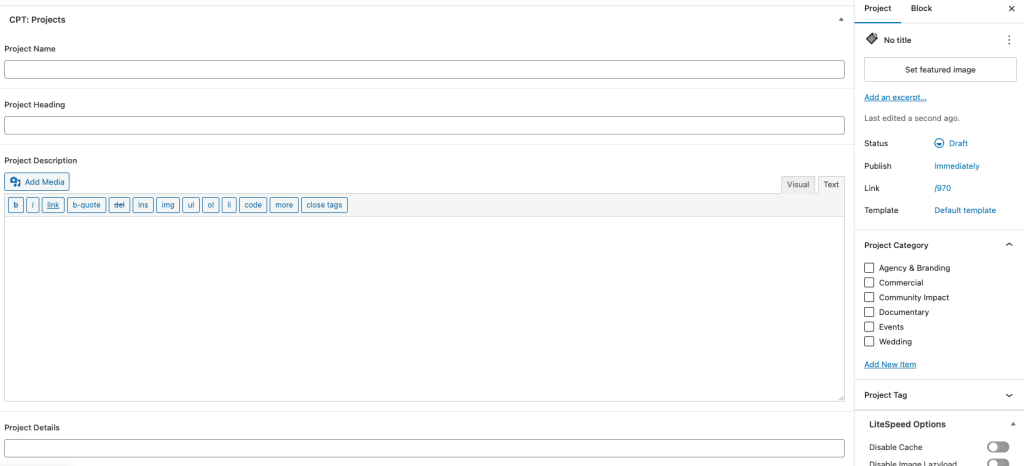
Projects
Similar to Pages, it includes a title, featured image, blocks, and text.
To create a new post, select Add New Project.
Start with a Group block with the Mixed Content group style applied. All other blocks used to create the project case study should be within this group (images, content, groups, columns, etc.)
Additional steps include:
- Categories
- E.g. Regional News, Company Releases, etc
- Select the Primary Category – dependent on the categories already selected
Required fields:
- Title/Project Name
- Project Heading
- Project Description
- Project Details
- Services
- Project Feature Video URL
- Vimeo URL
Now that you’ve published the project don’t forget to go to the Our Work page and add it to the Project Listings block so it will be displayed on the site.
Contact Us
Questions? We’re here to help! Reach out anytime if you need a hand.

Lisa Greig
Account Manager
lisa@rockandbloom.com